How to Apply Skin Tints for a Flawless, Radiant Look
Skin tints are the easiest way to get that “your skin, but better” finish. They even tone, add a touch of coverage, and leave skin looking fresh without feeling heavy. Think lightweight, breathable, and effortlessly polished.
If you love a natural look, need a quick everyday base, or want something that plays nicely with skincare, a skin tint fits right in. Below, we’re breaking down what skin tints are, how to choose one, and exactly how to apply it for smooth, radiant results.
What Are Skin Tints?
A skin tint is a lightweight complexion product that provides sheer to light coverage while helping skin look more even and hydrated. Most skin tints are designed to feel comfortable, blend easily, and keep your natural skin texture visible, instead of covering it completely.
It’s important to remember that skin tints are not the same as foundation. Skin tints provide the optimal cosmetic for those seeking minimal coverage and a distinctly natural appearance. So, if you’re a makeup minimalist, skin tints are a perfect choice for you.

How Skin Tints Differ From Foundation
Skin tints and foundations can both even out your complexion, but they’re built for different goals. Skin tints focus on a natural finish, hydration, and a lighter feel. Foundation is typically more coverage-focused and comes in a wider range of finishes, like matte, satin, or radiant. If you want a base that looks like real skin and wears like skincare, skin tints are a strong choice.

Why People Love Skin Tints
Skin tints are popular for good reason:
- Lightweight coverage that doesn’t feel cakey
- A hydrated, radiant finish
- Easy application with fingers, a sponge, or a brush
- Great for quick routines and touchups
How to Choose the Right Skin Tint for Your Skin Tone and Needs
The best skin tint is the one that looks invisible once it’s blended. Here’s what to consider before you add one to your routine.

Find Your Undertone Match
Skin tints usually come in a range of shades, but undertone still matters. Look at how your skin naturally reads:
- Cool undertones: pink, rosy, or bluish tones
- Warm undertones: golden, peachy, or yellow tones
- Neutral undertones: a balance of both
If you’re between shades, choose the one that disappears into your neck and jawline once blended.

Pick a Finish That Matches Your Skin Type
Your skin tint can look even better when it’s aligned with your skin’s needs:
- Dry skin: Choose a hydrating, radiant finish and focus on moisture-rich prep.
- Oily skin: Look for lightweight formulas, then set strategically with powder.
- Combination skin: Apply as usual, then set only where needed (usually T-zone).

Coverage Preferences
Skin tints are designed to keep things natural, but you can still customize:
- Prefer more coverage? Build thin layers and add concealer where needed.
- Prefer barely-there coverage? Mix your tint with moisturizer.
Best Tools to Apply Your Skin Tint
There’s no single “right” way to apply a skin tint. The best tool depends on your finish preference and how much coverage you want.

Fingertips
Fingers warm the product, helping it melt into the skin. This method gives the most natural finish and works great for quick routines.

Makeup Sponge
A damp sponge gives a seamless, soft-focus effect. It’s especially helpful if you’re building coverage slowly or want a more diffused finish.

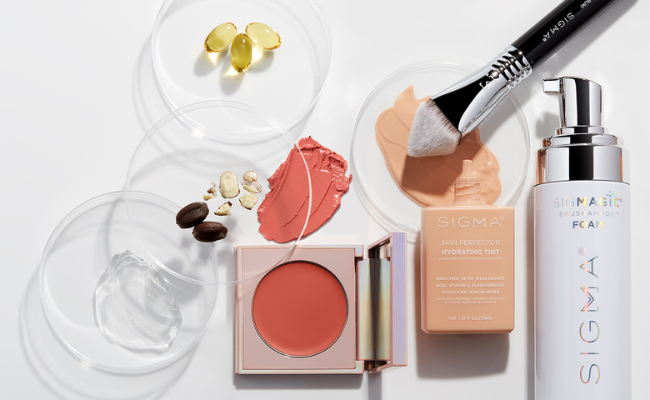
Foundation Brush
A foundation brush gives more control and polish, especially around the nose and mouth. It also helps apply product evenly without soaking it up.
Step-by-Step Skin Tint Application Guide
Keep this routine simple. Skin tints work best when you apply them in thin layers and blend intentionally.

Step 1: Prep Your Skin
Cleanse, moisturize, and apply SPF. If you’re using a primer, apply a thin layer and let it set for about 30 seconds.

Step 2: Dispense the Product
Start small. Dispense a small amount of skin tint onto the back of your hand or directly onto your fingertips. You can always add more.

Step 3: Dot and Blend
Dot your skin tint across:
- Forehead
- Cheeks
- Nose
- Chin
Then blend from the center of the face outward. Use:
- Fingers for a natural finish,
- A damp sponge for a softer blend, or
- A Sigma foundation brush, like the F80 Flat Kabuki™, for more precision and control
Focus on redness-prone areas first, then blend outward for the most even look.

Step 4: Set if Desired
If you love a radiant finish, you can skip setting entirely. If you want longer wear or reduced shine:
- Lightly set the T-zone with translucent powder.
- Finish with setting spray for added longevity.

Step 5: Finish Your Look
Skin tints pair beautifully with:
- Concealer (for spot coverage)
- Blush and bronzer (cream or powder)
- Highlighter (apply lightly to keep skin looking real)
Keep everything lightweight so your tint stays the star of the routine.
Common Skin Tint Mistakes to Avoid

Applying Too Much at Once
Skin tints are meant to be layered. Too much product can sit on top of the skin and look heavy.

Skipping Prep
Skin tints cling to dryness if your skin isn’t moisturized. Prep is what makes that “fresh skin” finish possible.

Forgetting the Edges
Always blend around:
- The jawline
- Hairline
- Ears
- Down the neck
This keeps everything seamless and natural.
Embrace Effortless Skin Beauty
Skin tints are a daily staple for a reason. They’re quick and comfortable, giving skin a healthy, radiant look without covering what makes your face yours. With the right shade match, prep, and tools, you’ll get a finish that looks polished in real life and on camera.
Ready to build your routine? Shop Sigma Beauty’s complexion essentials and tools.
Skin Tints FAQ
Tinted moisturizers typically focus more on hydration and less on coverage. Skin tints usually offer more complexion-evening benefits, with a finish that’s still lightweight and skin-forward.
Both work well. A brush gives more control and coverage, while a sponge offers a softer, more diffused finish. Fingers create the most natural look.
Start with a small amount, dot it across the face, and blend outward in thin layers. Focus on even blending around edges for the most natural finish.
To get the most polished look, use a foundation brush. For a softer finish, use a damp sponge. For quick everyday application, fingers work beautifully.